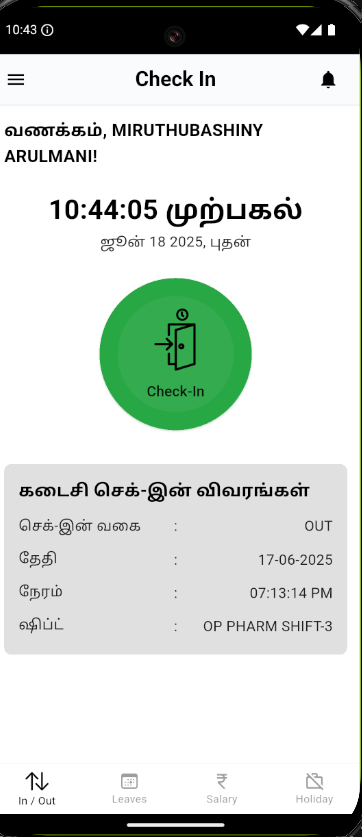
🌐 Flutter i18n (Internationalization)
📌 What is i18n?
Internationalization (i18n) is the process of designing your app so it can be easily adapted to different languages and regions without code changes.
✅ Benefits
Support users in multiple languages (e.g., English, Tamil, Hindi)
Improve accessibility and user experience
Prepare your app for a global audience
🎓 Flutter Intl Plugin Initialize
If you're using the Flutter Intl plugin (VS Code or IntelliJ):
Install the Flutter Intl plugin in your IDE
Right-click on your
libfolder >Initialize for the Flutter IntlThis creates:
lib/l10n/intl_en.arblib/generated/intl/folder with localization classes
Then you can run:
flutter pub get
And use S.of(context) to access localized strings.
To add new locale files:
Right-click
intl_en.arb>New Translation File
✨ How to Activate Flutter i18n
To activate internationalization support:
Open your
pubspec.yamlEnable code generation with:
flutter:
  generate: true
Add dependencies:
dependencies:
  flutter:
    sdk: flutter
  flutter_localizations:
    sdk: flutter
  intl: ^0.18.1
Place your
.arbfiles insidelib/l10n/(or your custom directory)Run:
flutter gen-l10n
This generates the necessary localization files in lib/generated/
📁 Folder Structure
lib/
├── l10n/
│   ├── intl_en.arb
│   ├── intl_ta.arb
│   └── intl_hi.arb
├── main.dart
└── generated/
    └── app_localizations.dart (auto-generated)
🧰 1. Setup in pubspec.yaml
dependencies:
  flutter:
    sdk: flutter
  flutter_localizations:
    sdk: flutter
  intl: ^0.19.1
flutter:
  generate: true
📝 2. Create .arb Files
Create intl_en.arb in lib/l10n/:
{
  "@@locale": "en",
  "title": "Hello World!",
  "greeting": "Hi, {name}!"
}
For Tamil (intl_ta.arb):
{
  "@@locale": "ta",
  "title": "ஹலோ வேர்ல்ட்!",
  "greeting": "வணக்கம், {name}!"
}
For Hindi (intl_hi.arb):
{
  "@@locale": "hi",
  "title": "नमस्ते दुनिया!",
  "greeting": "नमस्ते, {name}!"
}
⚙️ 3. Generate Localization Code
Run this command:
flutter gen-l10n
It will generate AppLocalizations inside lib/generated/.
🧹 4. Update main.dart
import 'package:flutter_localizations/flutter_localizations.dart';
import 'package:flutter_gen/gen_l10n/app_localizations.dart';

MaterialApp(
  locale: const Locale('en'), // or Locale('ta'), Locale('hi')
  supportedLocales: AppLocalizations.supportedLocales,
  localizationsDelegates: const [
    AppLocalizations.delegate, (if use Flutter Intl go with S.deLegate)
    GlobalMaterialLocalizations.delegate,
    GlobalWidgetsLocalizations.delegate,
    GlobalCupertinoLocalizations.delegate,
  ],
  home: MyHomePage(),
);
💬 5. Use Localized Strings in Widgets
import 'package:flutter_gen/gen_l10n/app_localizations.dart';

Text(AppLocalizations.of(context)!.greeting(name: 'Prem')),
🔄 6. Switch Language at Runtime
Define a StatefulWidget to hold and change the locale:
void setLocale(BuildContext context, Locale newLocale) {
  MyApp.of(context)!.setLocale(newLocale);
}
Then rebuild MaterialApp with the new locale.
🚀 Optional: Auto Translation
Use tools like:
arb_translatorGoogle Translate API (for paid usage)
Lokalise / POEditor for UI-based translation management
📚 Resources
🧪 Best Practices
Use consistent key naming (
pageTitle,checkIn_button, etc.)Avoid putting full sentences with multiple placeholders unless needed
Keep ARB files organized per feature or page (via naming, not file split)
